Firmware Upload - Guide
Introduction
Purpose
The following is a guide that contains instructions to upload the Firmware (FW) made for 3DR boards.
Tools
-
3DR Autopilot
-
USB cable (depending on the board to use)
-
A computer compatible with QGroundControl and Mission Planner
Step 1 - Flight Stack and Ground Station Selection
Flight stack
Currently, 3DR has support for the following flight stacks:
- Ardupilot (Flashed out of the box for all boards)
- PX4
Info
- FW version for the selected flight stack must be checked individually in 3DR Docs.
Warning
Every board's bootloader is able to co-exist with either flight stack. Modification of the bootloader is discouraged, unless specific needs arise.
Ground Station
Basically, every ground station that is MAVLink capable can be used for this purpose, here are the most popular ones:
Step 2 - Autopilot Configuration
Once a flight stack was chosen, you can follow the instructions for each of the ground stations mentioned above.
Warning
The ID of the binary needs to match with the bootloader's ID. Usually, the ground stations are taking care of this, and would let you know whenever theres a mismatch. This should be taken into account for pre-release, recent release and custom builds.
Mission Planner
The steps to load Ardupilot onto the 3DR board are the following:
-
Open Mission Planner software. Leave the carrier board unconnected.
-
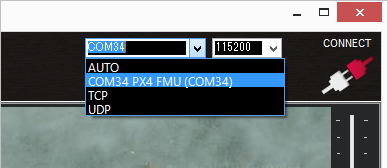
Select the COM port near to the Connect button in the upper-right corner of the window. Select the board (if multiple are connected) and baudrate (115200).
-
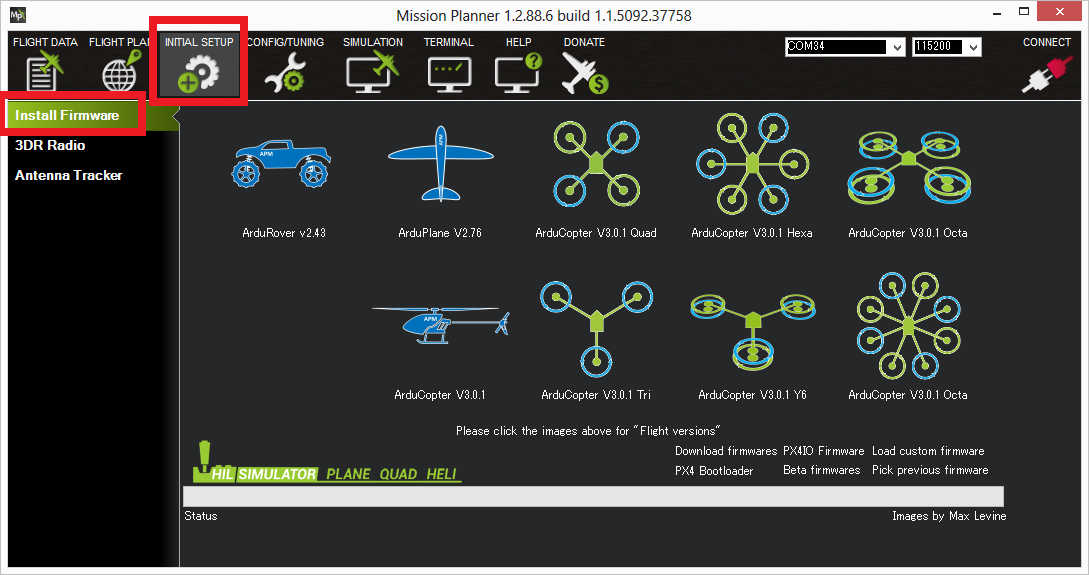
Select the Setup Tab then click on Install Firmware, select the appropriate icon that matches your application needs. Answer Yes when it asks "Are you sure?"
 It's possible that Mission Planner may ask you tun unplug, press OK and plug it back to identify the board ID.
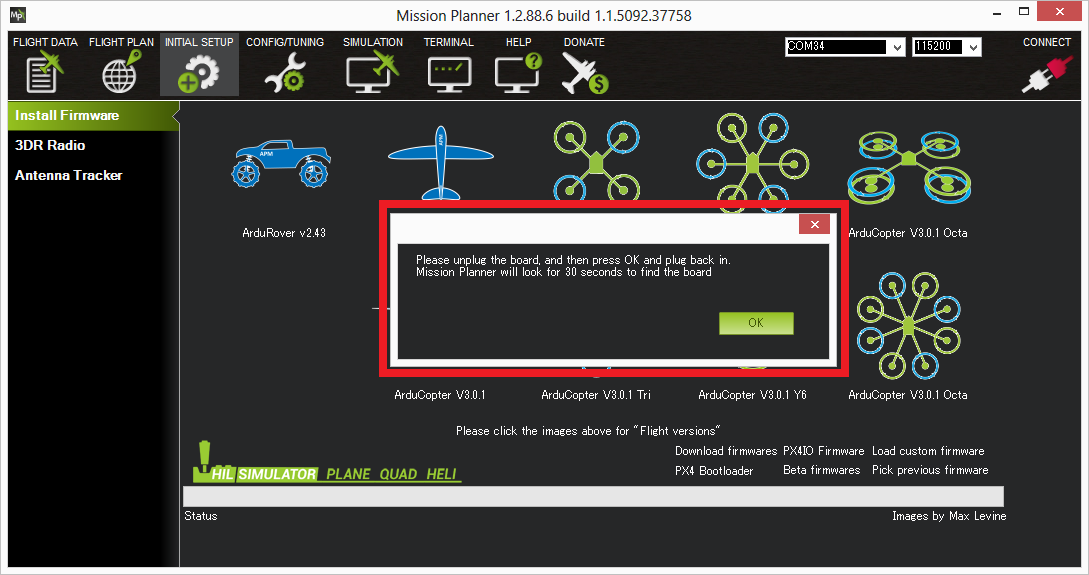
-
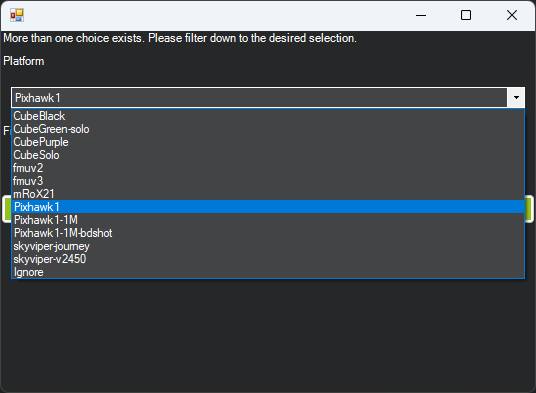
To install the latest stable firmware a dropdown box will show the available variants of that board. Select the appropriate one to continue.
-
Observe the messages that will indicate every stage of the process (e. g. “erase…”, “program…”, “verify..”, and “Upload Done”), until it says that the upload is complete.
-
Let it reboot and press Connect to verify the installation.
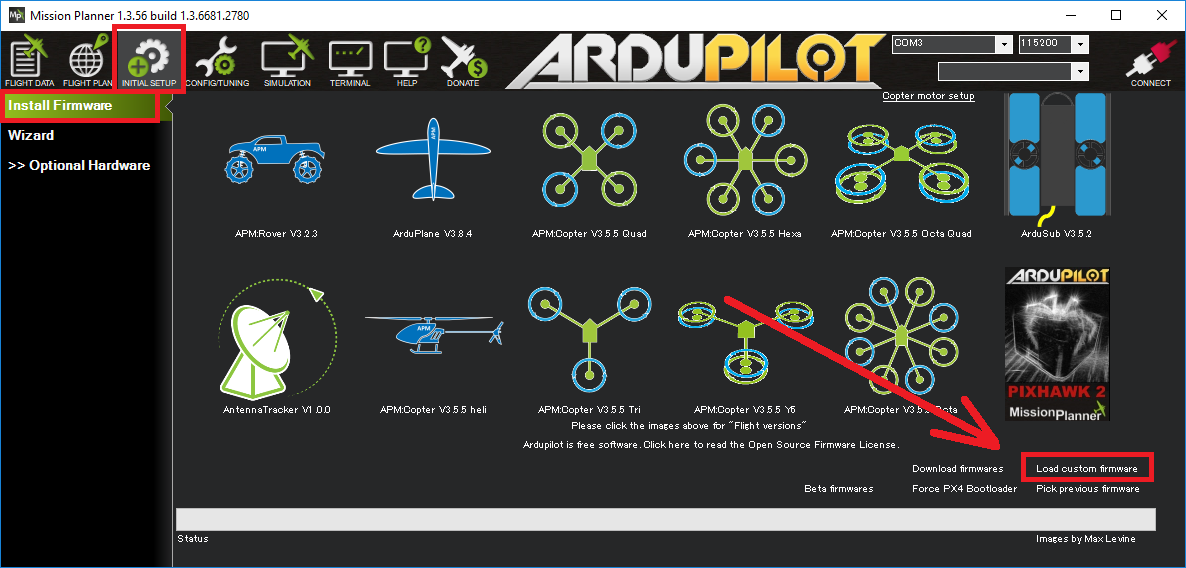
Mission Planner (Recent releases, Pre-releases and Custom builds)
The steps to load PX4/Ardupilot onto the 3DR board are the following:
-
Follow steps 1-3 of Mission Planner process, but stop at the point to select the vehicle variant. Proceed with the board identification if needed.
-
Click on Load custom firmware option and select your file, which can be Ardupilot (*.apj) or PX4 (*.px4).
-
Once selected and if the ID of the board vs the FW matches, then you should be able to see the messages that will indicate every stage of the process (e. g. “erase…”, “program…”, “verify..”, and “Upload Done”), until it says that the upload is complete.
-
Let it reboot and press Connect to verify the installation.
Warning
Ardupilot has a different FW version per vehicle, so you should make sure to know which one you are uploading. PX4 frame type can be selected during configuration.
QGroundControl
The steps to load PX4/Ardupilot onto the 3DR board are the following:
-
Open QGroundControl (QGC) software. Leave the carrier board unconnected.
-
Click on the upper left corner (QGC logo), then click the Vehicle Setup button.
-
You should see that there are only two tabs on the left pane: Summary and Firmware. No hardware should be connected at this point!
-
Click on the Firmware button and proceed to connect your board.
-
Select the branch or firmware flavor you need to upload. Note that you can choose either PX4 Pro or Ardupilot software from the menu. If you check the Advanced settings box you may select to upload any other binary. In this case select PX4 Pro to the latest stable version.
-
Wait until the writing and verification process ends. The board will reboot and it will start beeping afterwards.
-
You may now connect to it as usual from the QGC communications pane.
Fly responsibly, safely and securely.
Happy flying!